A KRIG plugin has to hold up in a real session. To get there we use what the team has learned from years of tracking, mixing and making heavy records, a technical library we keep going back to, and a lot of measurement.
01
Audio engineering
Who builds the DSP, how a plugin goes from a problem to code, and what we measure on the way.
Who works on a plugin
KRIG plugins are built by several people working together. Each of us brings knowledge and skills from a different part of making heavy records, and every plugin passes through all of it before it moves on.
DrumsDrum editing, bleed and gating on real multitracks, where gates and transient tools are tested hardest.
Guitars and bassTone, low end and level of heavy guitars and bass, in the riff and in the full mix.
VocalsScreams, growls and clean vocals: level, harshness and the space around them.
Mixing and masteringBus processing, peak control and loudness on finished records.
Signal processingThe detectors, filters, saturation stages and oversampling inside each plugin.
Interface designControls and meters that stay readable from a small laptop to a large studio screen.
TestingTest signals, levels and sample rates, and the four checks on every build.
Our libraryA small library of professional literature on audio engineering, DSP, acoustics and mixing. When experience alone does not settle a question, we go back to the books and the research they cite.
From problem to plugin
The target is set before any code is written, so we always know what a good result is.
The problem
Cymbals in the tom mics, guitars that turn harsh, a master that folds. Every plugin starts with something we kept hitting in our own sessions.
The research
We study how trusted tools handle that job, measure what they do to the signal, and write down what we know and what we are still guessing.
Our own DSP
We write the processing ourselves, so we can tune how fast a detector catches a kick or which harmonics a clipper adds. Each algorithm is measured and listened to alone.
Against the target
When the measurements and our ears disagree, it goes back for more work. Then it goes into a plugin and on to the four checks.
What we measure
Each plugin type has its own plan, at the levels and settings people use. The results feed the checks, the presets and the manual.
Gate and expanderThresholds, hysteresis, attack and release, sidechain filters.
SaturationHarmonics across drive, gain matching, oversampling under hard clipping.
EQResponse accuracy, dynamic band behaviour, analyzer and curve alignment.
Clipper and limiterCeiling accuracy, knee shape, release, separate reduction readouts.
CompressorRatio accuracy, timing, gain reduction metering against the signal.
MultibandCrossover accuracy, band independence, phase at the crossovers.
Reverb and delayDecay, early reflections, delay timing and feedback stability.
StereoChannel linking, stereo image under processing, mono compatibility.
One discipline per screen
Each kind of processing needs its own instrument. Pick a discipline to see the part of the real interface it is built around, and what that part tells you while you work.
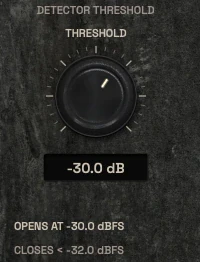
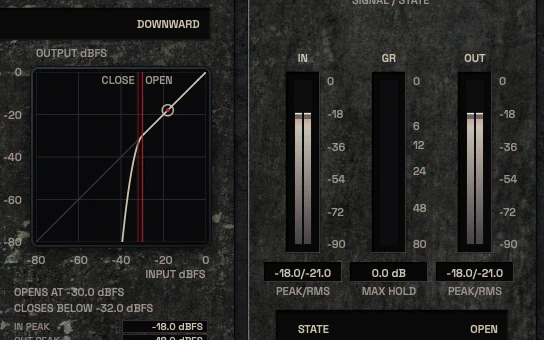
Nihil The mode selector, the static transfer curve with its open and close marks, and the IN, GR and OUT meters with the gate state
Gate and expander
The transfer curve maps input level to output level. The open and close marks sit apart, so a signal hovering at the threshold cannot make the gate chatter, and the live point shows where the signal sits on the curve right now. Beside it, the meters and the state readout come straight from the detector.
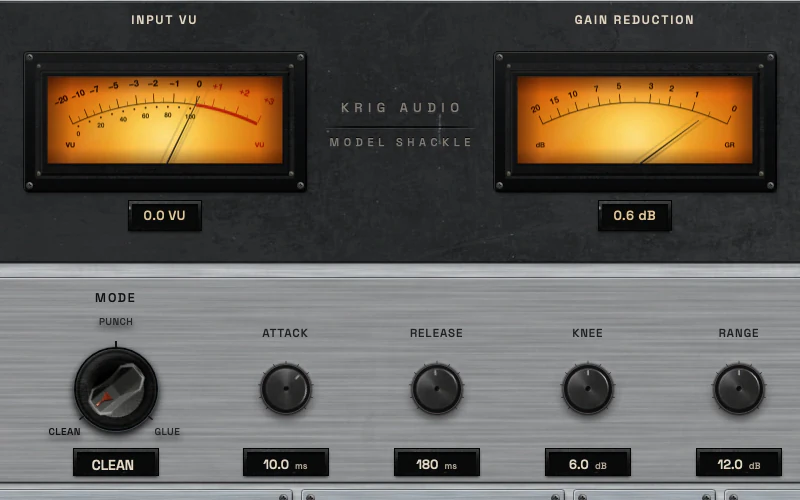
Shackle The input VU and the gain reduction needle above the ratio, mode and timing controls
Compression
Two needles, two measurements. The VU reads level with 300 ms ballistics and is calibrated so that 0 VU is the threshold; the second needle reads how many dB of gain reduction are being applied. They share a housing, never a quantity.
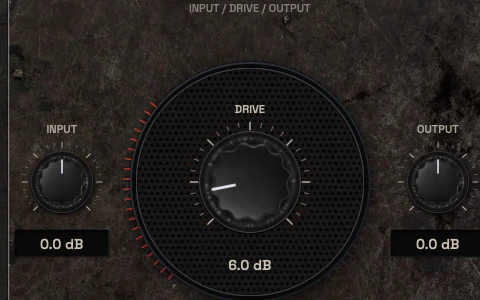
Pyre The large Drive control between Input and Output
Saturation
Drive is the largest control because it decides how hard the signal hits the model. Input and Output sit either side of it, and auto gain holds the level at -18 dBFS RMS, so turning Drive up changes the character you hear, not just the loudness.
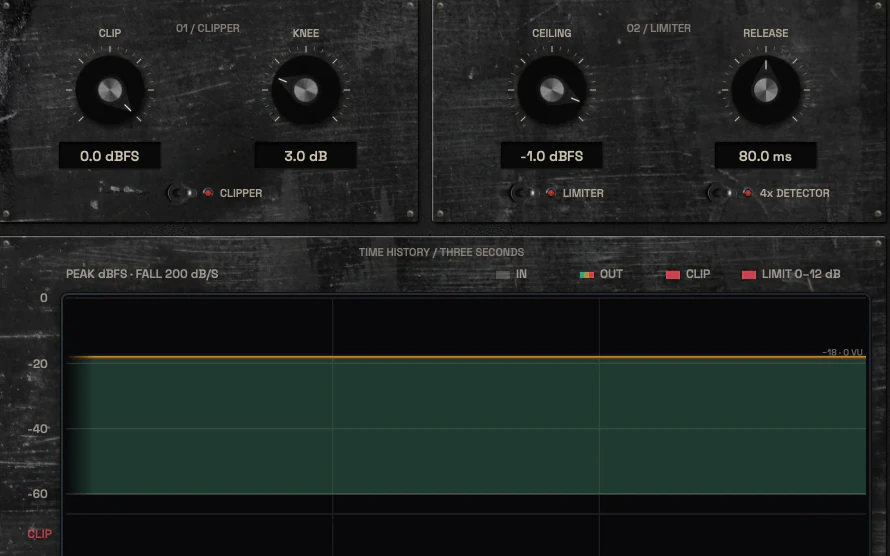
Entomb The clipper and limiter panels above the three-second history with separate clip and limit lanes
Clipping and limiting
Two stages in series, each with its own panel: Clip and Knee shave the fastest peaks, then Ceiling and Release catch what is left. The history below keeps clip and limit reduction in separate lanes, so you can see which stage is doing the work.
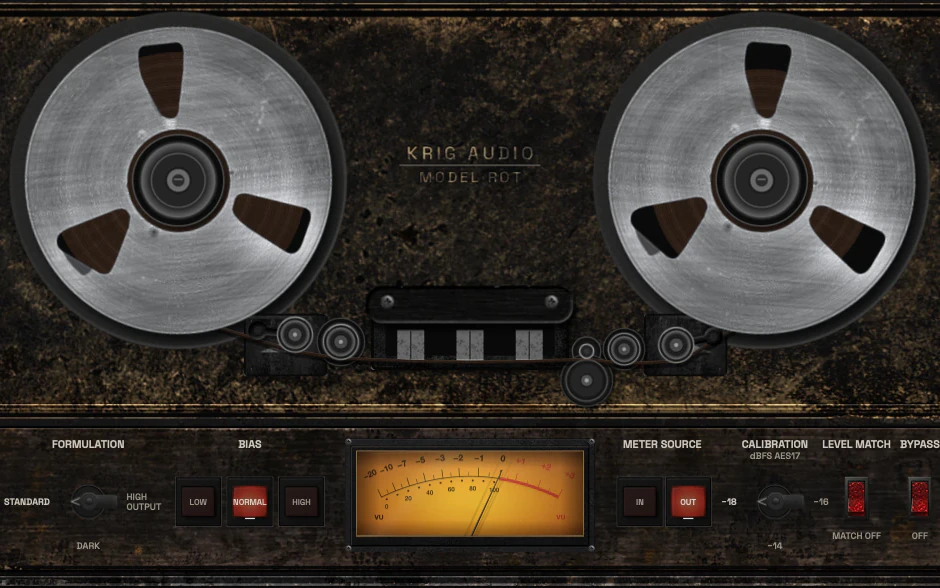
Rot The reels and tape path above the formulation, bias, VU and calibration controls
Magnetic tape
Two reels and a tape path through the heads sit at the centre of the machine. Below them are the settings a tape machine is defined by, speed, formulation and bias, each changing how the tape answers level and high frequencies, with the VU and calibration beside them.
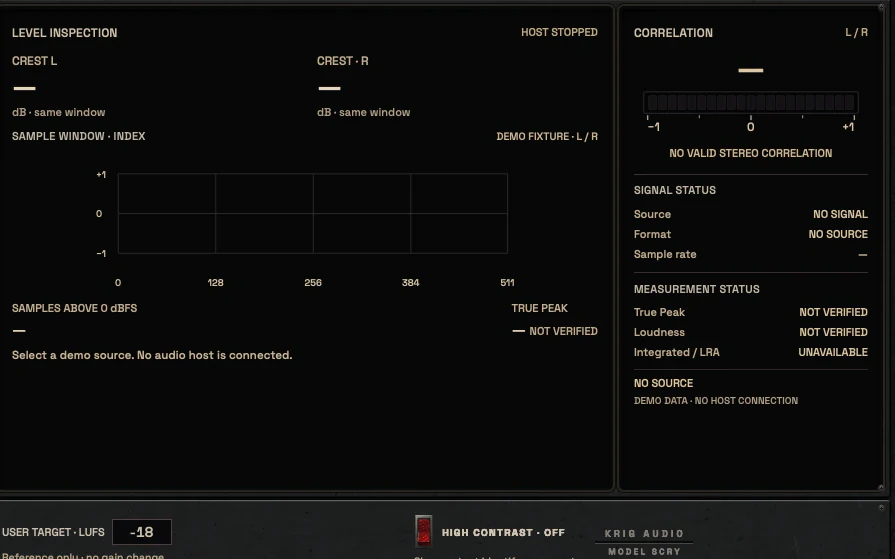
Scry Level inspection, the correlation meter and the signal and measurement status panel
Metering
Sample peak and RMS, crest factor, correlation and signal status, each in its own instrument with its unit. Where a value cannot be measured, the meter says so instead of showing a number.
Interface prototype: DSP not yet implemented. The picture shows labelled demo data, not a measurement.
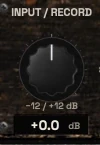
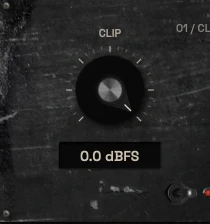
Each module takes one real control from a plugin in testing: the Threshold of Nihil, the Input and Record of Rot and the Clip of Entomb, shown as it is in the plugin beside a working copy. Turn the copy and the scope redraws the signal through that control’s curve. The traces are worked out from the curves, not recorded from the plugins.
Nihil
Gate
The hits pass and the bleed between them drops away.
In Nihil
-60.0 dB0.0 dBThreshold-18.0 dB
Rot
Tape
The peaks start to round while the body stays.
In Rot
-12.0 dB+12.0 dBInput / Record0.0 dB
Entomb
Clipper
Only the snare spikes are shaved off.
In Entomb
-12.0 dBFS0.0 dBFSClip-5.0 dBFS
02
Workflow and usability
What is on the screen, and the small things that save time in every session.
Nothing on screen is decoration
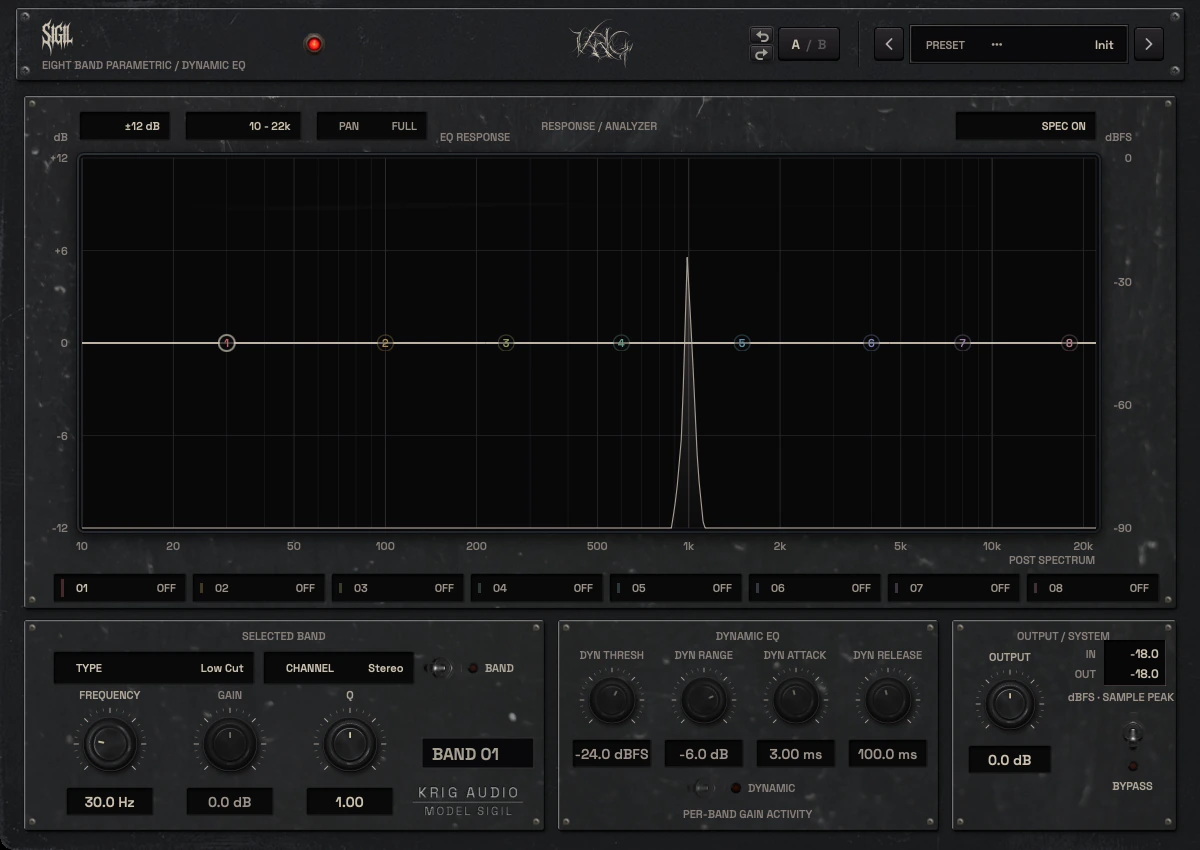
Every meter and display on a finished KRIG plugin is drawn from the signal it is processing, and every layout is checked from a small laptop to a large studio screen. Pick a plugin to see what each part of its screen shows.
12345
1Live spectrumThe analyzer behind the curve shows the signal after the EQ, on a real Hz axis.
2Eight bandsEach band switches on or off on its own.
3Selected bandType, channel, frequency, gain and Q for the band you are working on.
4Dynamic EQThreshold, range, attack and release, so a band moves only when the signal asks for it.
5OutputOutput level, with sample-peak readouts for input and output.
Built for the way you work
A plugin gets opened hundreds of times in one mix, so the small things decide whether it helps or gets in the way. These are the parts every KRIG plugin shares, from the header down to the tooltips. The six plugins in testing have all of them, and the nine still to come are built on the same header.
Sigil, as it is in the plugin: Undo and Redo, A/B and the preset field.
Undo and RedoTwo arrows sit next to the A/B switch. Pull a threshold too far, change three more controls, and you can still step back through each change in order instead of trying to remember where everything was.
A/B comparisonA and B are two complete settings of the same plugin, every parameter that affects the sound. B starts as a copy of A, so you can push one idea further and flip back to hear whether it was better. Both slots, and which one is active, are saved with the session. It compares settings and is never a bypass.
PresetsThe preset field opens on categories first, so you choose the kind of job before you scroll through names. Save, Save As and Copy A to B sit at the top of the menu, the arrows either side step through the library in order, and opening the menu never changes a parameter. Escape or a click outside closes it.
The whole preset namePreset names say what they do, so some of them are long. When one is cut short in the field, rest the pointer on it and the full name appears.
TooltipsRest the pointer on a knob, switch, fader or button, or tab to it from the keyboard, and a short note says what it does and what it changes in the sound. You reach for the manual less often.
Interface sizeThe Interface Size menu has two settings. At 75% the plugin sits comfortably beside the DAW on a laptop screen, and at 100% you see every control and meter at full size. The plugin keeps the size you chose with the session.
Keyboard controlEvery control can be reached and changed from the keyboard, which helps with fine moves one step at a time and with working without a mouse.
Feedback you can trustMeters, curves and readouts are drawn from the signal the plugin is processing. Each value shows as a number next to its control, an engaged switch looks pressed, and the header lamp lights when processing is active and goes out when the plugin is bypassed, so a glance tells you whether it is working.
One header for every pluginEvery KRIG plugin opens with the same header: name and job on the left, the power lamp, then Undo, Redo, A/B and the preset field in the same places. Once you know one plugin, you know where everything is in the next.
Try the header
Eight band parametric / dynamic EQ
Point at a control, or tab to it, to read what it does.
Interface size
A working copy of the KRIG header, built for this page from the plugins’ own layout. It shows how the controls behave and does not process audio. The preset names are each plugin’s factory presets.
03
Reliability and validation
The checks a plugin has to pass before release, and what we publish about where it was tested.
How we decide
When the measurements and our ears disagree, the plugin goes back for more work
A plugin can pass every test signal and still sound wrong on a real mix, or sound right while a meter shows it misbehaving. Either way it is not finished, and we keep working on it until the numbers and the listening agree.
How the DSP is tested
Listening tells us whether a plugin is good. Testing tells us whether it does what it says, every time, at every setting. This is the routine every plugin goes through.
01Known signals firstSine tones, sweeps, impulses and noise go through every mode at the levels people mix at. What comes out is measured against the target written down before any code: the response, the harmonics, the timing, and anything that should not be there, such as aliasing or noise.
02The edges, on purposeSilence, full-scale peaks, every control at both ends of its range, and the sample rates and buffer sizes a session can run at. A plugin has to stay stable and quiet at the settings nobody should use, because somebody will.
03Every control, movingParameters are automated and swept while audio plays, to find clicks, zipper noise and jumps. A control that only sounds right when it stands still is not finished.
04Meters checked against the truthEvery meter and display is fed signals whose values we already know, and must show exactly that. A meter that reads close enough is a meter you cannot trust.
05Every build, every timeThe tests run again on each new build, so fixing one thing cannot quietly break another. A failed test stops the build until it is understood.
The four checks
A plugin ships only after it passes all four, and we run them on every build, so a bug fix cannot quietly break something that already worked.
MeasurementThe DSP against the intended behaviour, with test signals, levels and sample rates.
Real DAWActual sessions in the major DAWs, on Windows and macOS.
Interface at every sizeLayout, readability and metering, from the smallest window to full screen.
ListeningReal productions in our own studios, judged by ear as well as by the numbers.
Presets and builds
Presets and real sessionsA preset that sounds good soloed but falls apart in a mix does not make the library. Before a preset goes into the library it is tried on several sources and levels: technical presets against the job they name, genre presets against real productions in that style.
Sessions come back as you left themBefore release, every plugin is checked for session recall: settings, both A/B slots and the window size return when the session reopens, and parameters automate the way the host expects.
Windows and macOSEvery plugin is built for both platforms, as VST3 for both and AU for macOS. The hosts and systems each plugin has been tested on, and its system requirements, are published before release.

 Eight band parametric / dynamic EQ